
Roasted Chickpeas That Stay Crunchy
6 views
Nothing is more disappointing than pulling a tray of roasted chickpeas from the oven, admiring those golden little nuggets, and discovering an hour later that they’ve turned chewy.
They looked perfect.
They weren't.
The problem usually isn't the oven, the olive oil, or even the seasoning. It's moisture. Chickpeas hold a surprising amount of water, and if that moisture isn't driven off before the beans finish browning, you'll get a crisp shell with a soft, slightly rubbery center.
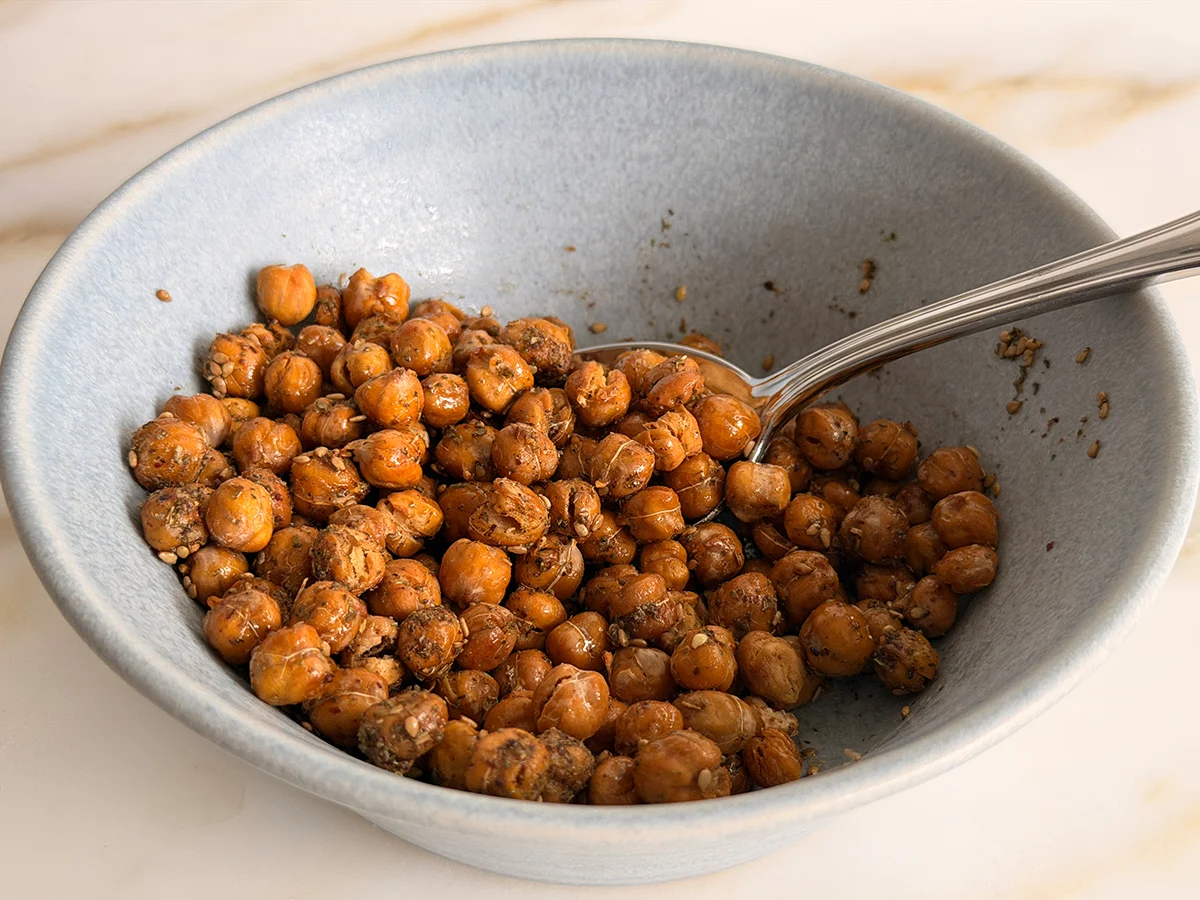
This method takes a different approach. Dry the chickpeas aggressively, roast them on a spacious pan, season at the right moment, and let them cool properly. The result is crunchy roasted chickpeas that work as a snack, salad topping, soup garnish, or crispy component in a quick meal.
Why roasted chickpeas go soft
Think of a chickpea as a tiny edible water balloon.
Even canned chickpeas, which are already cooked, contain plenty of moisture. USDA guidance recommends draining and rinsing canned beans, and research from USDA's Agricultural Research Service has also examined how processing affects chickpea texture and firmness.
That moisture has to escape during roasting.
If the chickpeas are crowded together, steam gets trapped around them. If they're still wet after rinsing, the first part of the oven time is spent evaporating surface water rather than developing a crisp exterior. Add a heavy coating of oil or a wet sauce too early, and the problem gets worse.
So the goal isn't simply "roast until brown."
It's dry first, roast hard, season strategically.
The crunchy roasted chickpea method
What you'll need
For about 4 snack-sized servings:
2 cans (15-ounce/425 g each) chickpeas, drained
1 tablespoon extra-virgin olive oil
1/2 teaspoon fine salt
1/2 teaspoon smoked paprika
1/2 teaspoon ground cumin
1/4 teaspoon garlic powder
1/4 teaspoon freshly ground black pepper
Optional: pinch of cayenne or chili powder
You'll also want a large, rimmed metal baking sheet and a clean kitchen towel or several layers of paper towel.
A bare metal sheet works particularly well here. Parchment makes cleanup easier, but direct contact with the hot metal can encourage stronger browning.
1. Drain and rinse thoroughly
Empty the chickpeas into a colander.
Rinse them under cool running water, tossing them gently with your fingers. This removes the canning liquid and gives you a cleaner base for seasoning. It can also reduce sodium; USDA material notes that draining and rinsing canned vegetables can lower sodium content, although the exact reduction varies.
Now comes the part people skip.
Dry them.
Really dry them.
2. Rub away loose skins
Spread the chickpeas across a clean kitchen towel and gently roll them around.
Some skins will loosen and fall away. Pick out the obvious loose skins, but don't waste ten minutes trying to remove every last one.
The skins aren't the enemy.
Surface moisture is.
After drying, leave the chickpeas exposed for another 10 minutes while the oven heats. That little pause helps more than you'd expect.
3. Preheat the oven properly
Set the oven to 425°F (220°C).
Give it time to fully preheat.
A lukewarm oven creates a slow drying environment. A properly heated oven immediately starts evaporating surface moisture and browning the exterior.
Spread the chickpeas over the baking sheet in a single layer. Don't pile them into the middle.
Crowding is the silent killer here.
4. Roast before seasoning
Toss the dry chickpeas with the olive oil and spread them out again.
Roast for 20 minutes.
Remove the tray, shake it firmly, then return it to the oven for another 15–20 minutes.
You're looking for deep golden-brown color, visibly wrinkled skins, and a dry, firm exterior.
Some chickpeas will split. That's fine.
Some will become darker than their neighbors. Also fine.
Ovens vary, so judge the chickpeas rather than worshipping the timer.
5. Season near the end
Mix the salt, smoked paprika, cumin, garlic powder, black pepper, and cayenne in a small bowl.
When the chickpeas are nearly crisp, toss them with the seasoning and return them to the oven for 3–5 minutes.
Why wait?
Finely ground spices can scorch if exposed to high heat for the entire roasting period. Garlic powder is especially prone to becoming bitter when pushed too far.
The short finishing roast gives the spices enough heat to cling and bloom without turning them into burnt dust.
The cooling step matters more than it looks
Here's the frustrating part: roasted chickpeas can feel slightly soft when they first leave the oven.
Don't panic.
They continue to firm as they cool.
Leave them on the baking sheet for 10–15 minutes, uncovered. Don't immediately transfer them to a bowl and don't cover them with foil.
Trapped steam has nowhere to go.
That final cooling period is part of the cooking process, not dead time.
For maximum crunch, allow them to cool completely before storing.
Three mistakes that ruin the crunch
Mistake #1: Using wet chickpeas
This is the big one.
If the beans still look glossy with water after rinsing, keep drying. Press them gently between towels rather than simply letting them drain in a colander.
A colander removes dripping water.
It doesn't remove the thin film of moisture clinging to every chickpea.
Mistake #2: Overcrowding the pan
Two cans of chickpeas should comfortably fit on a large half-sheet pan.
If you're using a small baking tray, use two pans.
Chickpeas need exposed surface area. When they're packed tightly together, the environment becomes humid and the beans effectively steam each other.
Spread them out.
It's boring advice. It works.
Mistake #3: Adding wet flavors too early
Honey, maple syrup, lemon juice, hot sauce, tahini, and similar ingredients are delicious—but they're terrible choices if your only goal is maximum crunch.
Use dry seasonings during roasting.
Add wet sauces immediately before serving instead.
That's especially useful if you're making roasted chickpeas for meal-prep bowls. A crunchy topping and a wet dressing should meet on the plate, not 12 hours earlier in the refrigerator.
How to make them extra crisp
For the most aggressive crunch, make four small adjustments.
Use canned chickpeas rather than freshly cooked chickpeas when speed matters. They're already cooked and convenient, and USDA's WIC guidance specifically recognizes canned beans as a useful time-saving option.
Dry them longer than feels necessary. Ten minutes of air-drying after towel-drying is worthwhile.
Don't drown them in oil. About 1 tablespoon for two 15-ounce cans is enough to coat the surface without making them greasy.
Roast until properly browned. Pale chickpeas usually aren't finished, even if the timer says they are.
For an especially dry, brittle texture, turn the oven off after roasting and leave the tray inside for another 5–10 minutes with the door slightly ajar. This gives residual heat a chance to drive off more moisture.
Watch them closely the first time you try it. Every oven behaves differently.
Flavor combinations worth making
The basic smoked paprika and cumin version is excellent, but roasted chickpeas can move in several directions.
Style | Seasoning |
|---|---|
Smoky | Smoked paprika, cumin, black pepper, garlic powder |
Mediterranean | Dried oregano, thyme, garlic powder, lemon zest |
Curry | Curry powder, cumin, turmeric, black pepper |
Spicy | Chili powder, cayenne, smoked paprika |
Ranch-style | Dried dill, garlic powder, onion powder, black pepper |
Sweet-spicy | Cinnamon, smoked paprika, cayenne, tiny pinch of brown sugar |
For lemon flavor, use finely grated lemon zest after roasting rather than lemon juice before roasting.
That distinction matters.
Juice adds water. Zest adds concentrated citrus aroma without undoing the crisp texture you just worked for.
Turn them into part of a meal
Roasted chickpeas aren't limited to snacking.
CookingDish.net already approaches chickpeas as adaptable ingredients in meals, including roasted chickpeas as a vegetarian option for Mediterranean-style bowls. That's where these really earn their keep.
Try them over:
Greek yogurt with cucumber, tomatoes, and herbs
A Mediterranean grain bowl with quinoa and roasted vegetables
Tomato soup instead of croutons
A green salad with feta and cucumber
Hummus with chopped vegetables and warm flatbread
Rice bowls with roasted vegetables and tahini
Creamy soups that need something crunchy on top
The trick is to add them at the last moment.
A bowl assembled at noon and eaten at 7 p.m. won't preserve the same crunch if the chickpeas have been sitting under dressing all afternoon.
Keep the crispy component separate.
Can you make them in an air fryer?
Absolutely.
For roughly two cans of well-dried chickpeas, try 390°F (200°C) for 14–20 minutes, shaking the basket every 5 minutes.
Don't fill the basket to the top.
Air fryers vary substantially in basket size and airflow, so start checking around the 14-minute mark. A compact basket may need multiple batches, which sounds annoying until you compare it with trying to rescue an overcrowded batch of soggy chickpeas.
The oven method is easier for larger quantities.
The air fryer is faster for small ones.
How to keep roasted chickpeas crunchy overnight
Let them cool completely first.
Then store them in a container at room temperature with the lid loosely fitted rather than aggressively sealed, provided your environment is reasonably dry.
Avoid the refrigerator.
Cold storage introduces a humid environment, and the chickpeas will gradually lose their crisp texture.
If they soften overnight, don't throw them away. Spread them on a baking sheet and re-crisp them at 350°F (175°C) for 5–10 minutes, then cool them again before storing.
For best texture, make only as much as you'll eat within a couple of days.
Frequently asked questions
Why are my roasted chickpeas crunchy outside but soft inside?
They still contain too much internal moisture. Roast them longer at the same temperature rather than simply increasing the oil. Thorough drying before roasting also makes a noticeable difference.
Should I remove the chickpea skins?
No. Removing loose skins can help with texture, but it's optional. Don't sacrifice half your afternoon trying to peel every chickpea.
Should I boil canned chickpeas before roasting?
No. They're already cooked. Drain, rinse, dry, and roast.
Can I use dried chickpeas?
Yes, but cook them completely first. Undercooked chickpeas won't turn into a pleasant crunchy snack just because they're exposed to a hot oven. Cooked chickpeas also need to be thoroughly dried before roasting.
Why did my chickpeas become soft after I added seasoning?
If the seasoning contained liquid—such as lemon juice, vinegar, hot sauce, or honey—you reintroduced moisture. Use dry spices during roasting and add wet ingredients immediately before eating.
The little trick that makes the biggest difference
If you remember only one thing, remember this:
Dry chickpeas aggressively before they ever touch the oil.
Then give them space, roast them until genuinely browned, season toward the finish, and let them cool uncovered.
That's the difference between chickpeas that are merely roasted and chickpeas that actually crunch.
For a weeknight meal, make a batch while the oven is already running. Let them cool while you assemble the rest of dinner. Then scatter the crisp chickpeas over the bowl just before serving.
No soggy topping.
No sad little bean pellets.
Just crunch.
crunchy roasted chickpeas recipe
crispy chickpeas that stay crunchy
air fryer chickpeas snack
roasted chickpea meal prep
chickpea snack troubleshooting
Found this helpful? Share it!